9.08.2008

制作PDF的软件和方法

我们知道很多种分割合并制作PDF的软件和方法。但我们还是推荐你使用这些最受欢迎的方法。这里推荐的工具和服务有些是免费版的,当然也有需要付费的。尽管如此,他们仍然比我们熟知的一些软件要便宜的多~

在线PDF转换
zamar

Adobe公司的 Create PDF Online 能够将包括网页在内的多种形式转换为 Adobe PDF。在网站上我们还可以做图像和文字的扫描识别。(在国内能做这个的真的不多~)

BCL Technology的 PDF Online 能够在人们最需要它的时候快速的生成PDF文件。作为他们的基本服务, 无论你身处哪里,家里,公司还是世界的任何角落,PDF Online 都能帮助你从PC, Mac,或者 Linux上生成PDF文件。

ESP的 PDF-o-matic运用简单的PHP脚本语言帮你完成转换。

Neevia 不需要安装任何软件,即可帮你直接完成由其他文件转换成 PDF或者是图像。

PDF4U 简单两步即可在线创建PDF文件。你可以上传到服务器在线转换,也可以下载免费的PDF4U Printer转换器.

Text2PDF是一个非常灵活又强有力的能转换文件,报告,表格到PDF的工具。具有多种语言选择,包括中,日,韩,徳,泰,希伯来等。

Loop Service 同样是一款基于网络的上传文件,转换为PDF的工具,不需安装任何软件。

Zamzar 在线转换,不需安装软件,支持多种格式转换,而且格式正在不断增加中。

您现在看到的文章来自于[布瓜堂-关注小事成就大事]我们关注方便实用的在线工具http://www.buguat.com

桌面转换
bluebeam

Ghostscript 是一个能提供与PDF和与其相关文件服务的软件. Ghostscript 是一系列相关软件的合称。

Softland的 doPDF对于个人和商业使用都是免费的。使用doPDF通过选择“打印”命令你可以创建具有搜索功能的PDF文件。轻轻点击,即可完成由Excel, Word或者是 PowerPoint,甚至是电子邮件和你喜欢的网站PDF的转换。

PDF995 能够轻松创建具有专业品质的PDF文件。界面亲和,点击“打印”即可直接完成多种格式的转换 ,还具有阅读器可以马上预览结果。 Pdf995支持网络文件的保存,共享打印,页面定制和大尺寸打印。

Google Docs——很知名吧?具有把文件保存成PDF的功能,同样通过简单的步骤即可完成共享。

primoPDF

ActivePDF的 PrimoPDF 通过PrimoPDF® printer几秒之内就可完成由 Word, Excel等多种格式到PDF的高质量转换。

MyPDFCreator 除了具有创建高质量PDF文件功能外,还具有安全管理和合并多个文件的功能。

CutePDF Writer 几乎能从打印方式支持所有文件格式到高质量PDF的转换。个人和商务使用都是绝对免费的。无水印,无广告,支持64位的 Windows.

PDF Creator 能够通过 Windows应用程序方便的创建文件。使用方式和Word, StarCalc的打印功能类似.

Global Graphics的 Jaws PDF Creator 提供了高质量的转换,及注释,合并等功能于一体。特别适合单用户,小公司办公和企业团体。

OpenOffice ——熟知的开源办公软件,同样具有转换PDF的功能。

Nuance的 PDF Converter需要付费,但是你一旦使用,就会发现你无法离开他了,因为许多功能实在是太棒了!(包括右键菜单中许多你想象不到的强大功能).

e-PDF Converter能够将 PDF反转为文件,表格,而且看上去和以前的一模一样。而且,它的费用是其他类似软件的 1/3。

Smart PDF Converter简单易用又功能强大。能将PDF转换为可编辑的Word,或者是HTML,TXT, XLS, JPEG, RTF, TIFF和其他格式的文件.

DocuDesk的 deskPDF 能创建100%兼容Adobe Acrobat的PDF文件。无论你是Microsoft Office用户,或者是 CAD的使用者,或者是什么其他300多款软件的使用者,deskPDF只需简单一步即可轻松完成PDF专业级的制作。

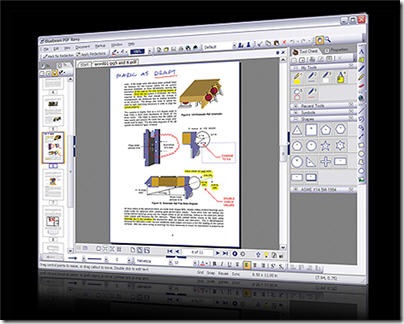
Bluebeam的 PDF Revu 对那些需要简单又智能的转换方案的用户来说可算是最理想的了. Bluebeam可以在Word, Excel 或者是PowerPoint的控制工具面板中田间控制按钮,所以转换步骤就会变得前所未有的简单 。而对于其他 Windows 软件(比若说WordPerfect, Outlook, image files来说.) Bluebeam提供了Bluebeam PDF Printer创建驱动,直接创建PDF ,还支持其他九种文件的转换,真的是十分简单啊.

Foxit Reader ——我们常用的PDF阅读器。自身同样具有编辑和创建的功能 .

Sowedoo的 EasyPDF Converter 能帮你在数秒内完成地图,建议书,报告,笔记到高质量安全的PDF文件的转换。而且你还可以通过互联网共享,或者通过电子邮件发送,而且毫无困难

您现在看到的文章来自于[布瓜堂-关注小事成就大事]我们关注方便实用的在线工具http://www.buguat.com

9.02.2008

LaTeX的代码样式

把自己总结的用了很久的一些LaTeX的代码样式发上来,这些样式平时用得很多。对我来说非常珍贵呀。

%%%%%%%%%%%%%%%%%%%%%%%%%%%%%%%%%%%%%%%%%%%%
%一些最基本的环境
%%%%%%%%%%%%%%%%%%%%%%%%%%%%%%%%%%%%%%%%%%%%
%居中环境
\begin{center}

\end{center}
%左对齐环境
\begin{flushleft}

\end{flushleft}
%右对齐环境
\begin{flushright}

\end{flushright}
%%%%%%%%%%%%%%%%%%%%%%%%%%%%%%%%%%%%%%%%%%%%
%小页环境(可嵌入上面那三种环境中形成组合)
\begin{minipage}{**cm}

\end{minipage}
%
%%%%%%%%%%%%%%%%%%%%%%%%%%%%%%%%%%%%%%%%%%%%

%%%%%%%%%%%%%%%%%%%%%%%%%%%%%%%%%%%%%%%%%%%%
%列举样式
%%%%%%%%%%%%%%%%%%%%%%%%%%%%%%%%%%%%%%%%%%%%
% itemize 列举样式1:· · · ·
\begin{itemize}
\vspace{-2.8mm}\item
\end{itemize}
%%%%%%%%%%%%%%%%%%%%%%%%%%%%%%%%%%%%%%%%%%%%

%%%%%%%%%%%%%%%%%%%%%%%%%%%%%%%%%%%%%%%%%%%%
% itemize 列举样式2:* * * *
\begin{itemize}
\vspace{-2.8mm}\item[*]
\vspace{-2.8mm}\item[**]
\end{itemize}
%%%%%%%%%%%%%%%%%%%%%%%%%%%%%%%%%%%%%%%%%%%%

%%%%%%%%%%%%%%%%%%%%%%%%%%%%%%%%%%%%%%%%%%%%
% itemize 列举样式3:任意符号
\begin{itemize}
\renewcommand\labelitemi{}%这里面写符号
\vspace{-2.8mm}\item
\end{itemize}
%%%%%%%%%%%%%%%%%%%%%%%%%%%%%%%%%%%%%%%%%%%%

%%%%%%%%%%%%%%%%%%%%%%%%%%%%%%%%%%%%%%%%%%%%
% itemize 列举样式4:彩色符号
\begin{itemize}
\setlength\baselineskip{12pt} %用这个命令来调整间距应该比较具有通用性
\item[\textcolor{black}{$\spadesuit$}] 文字。。。
\item[\textcolor{red}{$\heartsuit$}] 文字。。。
\item[\textcolor{black}{$\clubsuit$}] 文字。。。
\item[\textcolor{red}{$\diamondsuit$}] 文字。。。
\end{itemize}
%
%%%%%%%%%%%%%%%%%%%%%%%%%%%%%%%%%%%%%%%%%%%%

%%%%%%%%%%%%%%%%%%%%%%%%%%%%%%%%%%%%%%%%%%%%
% enumerate 列举样式1:1. 2. 3. 4.
\begin{enumerate}
\vspace{-2.8mm}\item
\end{enumerate}
%
%%%%%%%%%%%%%%%%%%%%%%%%%%%%%%%%%%%%%%%%%%%

%%%%%%%%%%%%%%%%%%%%%%%%%%%%%%%%%%%%%%%%%%%%
% enumerate 列举样式2:(1) (2) (3) (4)
\begin{enumerate}
\renewcommand\labelenumi{ \theenumi }%就在前面那个括号的空格处加符号
%\setlength\itemindent{}%这个会使列举的左移或右移指定的距离
\vspace{-2.8mm}\item
\end{enumerate}
%
%%%%%%%%%%%%%%%%%%%%%%%%%%%%%%%%%%%%%%%%%%%

%%%%%%%%%%%%%%%%%%%%%%%%%%%%%%%%%%%%%%%%%%%%%%
%图形插入样式
%%%%%%%%%%%%%%%%%%%%%%%%%%%%%%%%%%%%%%%%%%%%%%
%图形排版样式1:定点
%图形排版时名称一般都在下方
\begin{center}
\includegraphics[width=10cm,height=6cm]{*.eps}%就在前面括号中写图片名
\renewcommand{\figurename}{图}
\caption{}
\label{}
\end{center}
%
%%%%%%%%%%%%%%%%%%%%%%%%%%%%%%%%%%%%%%%%%%%

%%%%%%%%%%%%%%%%%%%%%%%%%%%%%%%%%%%%%%%%%%%%%%
%图形排版样式2:浮动
%图形排版时名称一般都在下方
\begin{figure}
\begin{center}
\includegraphics[width=10cm,height=6cm]{*.eps}%就在前面括号中写图片名
\renewcommand{\figurename}{图}
\caption{}
\label{}
\end{center}
\end{figure}
%
%%%%%%%%%%%%%%%%%%%%%%%%%%%%%%%%%%%%%%%%%%%

%%%%%%%%%%%%%%%%%%%%%%%%%%%%%%%%%%%%%%%%%%%%%%
%图形排版样式3:两个图片并列,统一取名
%图形排版时名称一般都在下方
\begin{figure}
\begin{center}
\begin{minipage}[c]{0.5\textwidth}
\centering\includegraphics[width=5cm,height=3cm]{*.eps}%就在前面括号中写图片名
\end{minipage}%
\begin{minipage}[c]{0.5\textwidth}
\centering\includegraphics[width=5cm,height=3cm]{*.eps}%就在前面括号中写图片名
\end{minipage}
\renewcommand{\figurename}{图}
\caption{}
\label{}
\end{center}
\end{figure}
%
%%%%%%%%%%%%%%%%%%%%%%%%%%%%%%%%%%%%%%%%%%%

%%%%%%%%%%%%%%%%%%%%%%%%%%%%%%%%%%%%%%%%%%%%%%
%图形排版样式4:两个图片并列,分别取名
%图形排版时名称一般都在下方
\begin{figure}
\begin{center}
\begin{minipage}[c]{0.5\textwidth}
\centering\includegraphics[width=5cm,height=3cm]{}%就在前面括号中写图片名
\renewcommand{\figurename}{图}
\caption{ }
\label{}
\end{minipage}%
\begin{minipage}[c]{0.5\textwidth}
\centering\includegraphics[width=5cm,height=3cm]{}%就在前面括号中写图片名
\renewcommand{\figurename}{图}
\caption{ }
\label{}
\end{minipage}
\end{center}
\end{figure}
%
%%%%%%%%%%%%%%%%%%%%%%%%%%%%%%%%%%%%%%%%%%%

%%%%%%%%%%%%%%%%%%%%%%%%%%%%%%%%%%%%%%%%%%%%%%
%图形排版样式5:两个图片作为子图并列,分别取名。四个可形成图形阵列。在下方有一个总名称
\begin{figure}
\centering
\subfigure[子标题]{\includegraphics[width=0.45\textwidth]{*.eps}}
%\mbox{\hspace{0.5cm}}
\subfigure[子标题]{\includegraphics[width=0.45\textwidth]{*.eps}}
\\
\subfigure[子标题]{\includegraphics[width=0.45\textwidth]{*.eps}}
%\mbox{\hspace{0.5cm}}
\subfigure[子标题]{\includegraphics[width=0.45\textwidth]{*.eps}}
\renewcommand{\figurename}{图}
\caption{总标题}
\label{}
\end{figure}
%
%%%%%%%%%%%%%%%%%%%%%%%%%%%%%%%%%%%%%%%%%%%

%%%%%%%%%%%%%%%%%%%%%%%%%%%%%%%%%%%%%%%%%%%%%%
%图形排版样式6:图片在盒子中
\begin{figure}
\begin{center}
\fbox{\includegraphics[width=10cm,height=6cm]{*.eps}}%就在前面括号中写图片名
\renewcommand{\figurename}{图}
\caption{}
\label{}
\end{center}
\end{figure}
%
%%%%%%%%%%%%%%%%%%%%%%%%%%%%%%%%%%%%%%%%%%%

%%%%%%%%%%%%%%%%%%%%%%%%%%%%%%%%%%%%%%%%%%%%%%
%图形排版样式7:图文混排,段落插入图片用picins宏包和\parpic命令
%%%%%%%%%%%%%%%%%%%%%%%%%%%%%%%%%%%%%%%%%%%%%%%%%%%%%%%%%%%%%%%%
%
\parpic{%
\includegraphics[width=3.0cm]%
{*.eps}}
%
%%%%%%%%%%%%%%%%%%%%%%%%%%%%%%%%%%%%%%%%%%%

%%%%%%%%%%%%%%%%%%%%%%%%%%%%%%%%%%%%%%%%%%%
% 表格样式
%%%%%%%%%%%%%%%%%%%%%%%%%%%%%%%%%%%%%%%%%%%
% 基本表格样式
% 在下面那个括号中,用|表示画竖线,而l表示单元格中的内容在单元格中左对齐,
% c表示单元格中的内容在单元格中中对齐,r表示单元格中的内容在单元格中右对齐。
% 如|c|c|c|就表示画一个3列有竖线的表,当然|也可略,就不画竖线出来;
% 用\hline画横线,一般是表的一行内容输入完并强制换行(\\)后,在后面写
% \hline,然后后面再写下一行内容。当然\hline也可略,就不画横线出来;
% 下面这个表格是一个3行3列的表格
\begin{tabular}{|c|c|c|}
\hline
*** & *** & ***\\
\hline
*** & *** & ***\\
\hline
*** & *** & ***\\
\end{tabular}
%
%%%%%%%%%%%%%%%%%%%%%%%%%%%%%%%%%%%%%%%%%%%
% 下面这种形式可以指定表格的宽度。在下面那个括号中写上0.5\textwidth
% 就可得到一个半张纸宽的一个表格;
% 写上\textwidth就可得到一个整张纸宽的一个表格。
\begin{tabular*}{***}{|c|c|c|}
\hline
*** & *** & ***\\
\hline
*** & *** & ***\\
\hline
*** & *** & ***\\
\end{tabular*}
%
%%%%%%%%%%%%%%%%%%%%%%%%%%%%%%%%%%%%%%%%%%%

%%%%%%%%%%%%%%%%%%%%%%%%%%%%%%%%%%%%%%%%%%%
% 表格样式1:标题在图表上方,去掉了冒号
\begin{table}
\begin{center}
%\makeatletter\def\@captype{table}\makeatother
\renewcommand{\tablename}{表}
\caption{}
\label{}
\begin{tabular}{}

\end{tabular}
\end{center}
\end{table}
%
%%%%%%%%%%%%%%%%%%%%%%%%%%%%%%%%%%%%%%%%%%%%%

%%%%%%%%%%%%%%%%%%%%%%%%%%%%%%%%%%%%%%%%%%%%%
%表格样式2:用tabularx宏包
\begin{center}
\begin{tabularx}{350pt}{|c|X|c|X|}
\hline
\multicolumn{2}{|c|}{Multicolumn entry!}& THREE& FOUR\\
\hline
one&
\raggedright\arraybackslash\setlength\baselineskip{12pt}
The width of this column depends on the width of the table.& three&
\raggedright\arraybackslash\setlength\baselineskip{12pt}
Column four will act in the same way as column two, with the same width. \\
\hline
\end{tabularx}
%
%%%%%%%%%%%%%%%%%%%%%%%%%%%%%%%%%%%%%%%%%%%%%

%%%%%%%%%%%%%%%%%%%%%%%%%%%%%%%%%%%%%%%%%%%%%
%表格样式3:高级表格控制
\begin{table}
\begin{center}
\scriptsize
\renewcommand{\arraystretch}{1.3}
\caption{Quasi-normal frequencies for the scalar perturbation in
the stationary Schwarzschild background. \label{tab:1}}
\begin{tabularx}{380pt}{*{5}{>{\centering\arraybackslash}X|}>{\centering\arraybackslash}X}
\hline &&\multicolumn{2}{c|}
{\textbf{Exact solution}}&\multicolumn{2}{c}{\textbf{Numerical solution}} \\
\hline
$\sqrt{M}$&$m$&$\omega_R$&$\omega_I$&$\omega_R$&$\omega_I$ \\
\hline
0.2&1&1&-0.4&1.002&-0.400 \\
0.4&1&1&-0.8&0.965&-0.799 \\
0.4&2&2&-0.8&2.003&-0.800 \\
0.4&3&3&-0.8&3.004&-0.800 \\
0.4&4&4&-0.8&4.005&-0.800 \\
0.5&2&2&-1&1.999&-1.000 \\
0.5&3&3&-1&2.993&-1.000 \\
0.5&4&4&-1&4.007&-1.000 \\
1&4&4&-2&4.004&-2.001 \\
2&10&10&-4&10.014&-4.001 \\
3&10&10&-6&10.028&-6.011 \\
4&10&10&-8&9.973&-7.983 \\
\hline
\end{tabularx}
\end{center}
\end{table}
%
%%%%%%%%%%%%%%%%%%%%%%%%%%%%%%%%%%%%%%%%%%%%

%%%%%%%%%%%%%%%%%%%%%%%%%%%%%%%%%%%%%%%%%%%%
%公式样式

%%%%%%%%%%%%%%%%%%%%%%%%%%%%%%%%%%%%%%%%%%%%
%摘引环境1:段摘引
\begin{verbatim}


\end{verbatim}
%
%%%%%%%%%%%%%%%%%%%%%%%%%%%%%%%%%%%%%%%%%%%%

%%%%%%%%%%%%%%%%%%%%%%%%%%%%%%%%%%%%%%%%%%%%
%摘引环境2:行内摘引
\verb|*********|
%
%%%%%%%%%%%%%%%%%%%%%%%%%%%%%%%%%%%%%%%%%%%%

%%%%%%%%%%%%%%%%%%%%%%%%%%%%%%%%%%%%%%%%%%%%
%程序清单样式
\lstset{language=matlab}
\begin{lstlisting}[frame=trBL]{}
clf;
k=-80:80;
a(k~=0)=sin(pi*k(k~=0)/2)./(k(k~=0)*pi);
a(k==0)=0.5;
stem(k,a);
t=-3:0.01:3
\end{lstlisting}
%
%%%%%%%%%%%%%%%%%%%%%%%%%%%%%%%%%%%%%%%%%%%%%%


%%%%%%%%%%%%%%%%%%%%%%%%%%%%%%%%%%%%%%%%%%%%%%%%%%%%%%%%%%%%%%%%
% 参考文献样式
%%%%%%%%%%%%%%%%%%%%%%%%%%%%%%%%%%%%%%%%%%%%%%%%%%%%%%%%%%%%%%%%
\small
\renewcommand\refname{\hei 参考文献}
\begin{thebibliography}{99}
\setlength{\parskip}{0pt} %段落之间的竖直距离
\bibitem{tang}
\bibitem{liu}
\end{thebibliography}
%%%%%%%%%%%%%%%%%%%%%%%%%%%%%%%%%%%%%%%%%%%%%%
% 参考文献结束
%%%%%%%%%%%%%%%%%%%%%%%%%%%%%%%%%%%%%%%%%%%%%%

并列的子图形

27.3 并列的子图形

在某些情况下,有时会希望将并列的图形组成一组,而其中的每一幅图 都保持其独立性。 paisubfigure 宏包的 \subfigure 命令将这一 组做为一幅图形,其中的每一幅图做为子图形。例如:
\begin{figure}
\centering
\subfigure[Small Box with a Long Caption]{
\label{fig:subfig:a} %% label for first subfigure
\includegraphics[width=1.0in]{graphic.eps}}
\hspace{1in}
\subfigure[Big Box]{
\label{fig:subfig:b} %% label for second subfigure
\includegraphics[width=1.5in]{graphic.eps}}
\caption{Two Subfigures}
\label{fig:subfig} %% label for entire figure
\end{figure}
生成图 27.9。这里使用 LATEX 的引用命令 \ref{fig:subfig:a} 会得到 27.9(a)\ref{fig:subfig:b} 得到 27.9(b)\ref{fig:subfig} 得到 27.9
\includegraphics[width=1in]{graphic.eps}
像其它的并列图形一样,子图也可以在小页环境中使用。而且在一些情况下, 这样做还能更方便的得到理想的图形间距。例如:
\begin{figure}
\subfigure[Small Box with a Long Caption]{
\label{fig:mini:subfig:a} %% label for first subfigure
\begin{minipage}[b]{0.5\textwidth}
\centering
\includegraphics[width=1in]{graphic.eps}
\end{minipage}}%
\subfigure[Big Box]{
\label{fig:mini:subfig:b} %% label for second subfigure
\begin{minipage}[b]{0.5\textwidth}
\centering
\includegraphics[width=1.5in]{graphic.eps}
\end{minipage}}
\caption{Minipages Inside Subfigures}
\label{fig:mini:subfig} %% label for entire figure
\end{figure}
得到图 27.10,其中包括两个子图 27.10(a)27.10(b)

\includegraphics[width=1in]{graphic.eps}
27.10 中的子图标题比图 27.9 中的要宽一些。 这是因为子图标题的宽度和子图的宽度相同,图 27.9 中的子图 只包含图形,而图 27.10 中的子图包含了宽度为 0.5\textwidth 的小页。 子图的标记有两种形式:
  1. 一种是出现在子图的下面作为标题的一部分。这通过命令 \@thesubfigure 来生成。
  2. 另一种是在使用 \ref 命令的时候出现。这通过将命令 \p@subfigure 的输出处理后传递给 \thesubfigure 命令来生成。
上面的这些命令使用 subfigure 计数器和 \thefigure 命令。 子图的标记的格式由下面的命令来控制。
  • 命令 \thefigure 印出当前图形的编号。
  • 计数器 subfigure 记录子图的编号,命令 \alph{subfigure} 将计数器 subfigure 的值用小写字母印出,而 命令 \roman{subfigure} 则是用小写罗马数字印出(有关印出 计数器值的命令可参见文献 [1, 第 98 页] 和 [3, 第 446 页]。)。
  • 命令 \thesubfigure 缺省使用小写字母,如 (a),(b) 等。
  • 命令 \@thesubfigure 缺省为 \thesubfigure\space,即在 标题标记和文本之间加上一个空白。
  • 命令 \p@subfigure 缺省为 \thefigure
如果改变子图标题的标记,字体等的缺省值,可参见文献 [10]。下面 给出几个简单的例子:
  • 若想让子图标题标记使用小写罗马数字如 (i), (ii)等, \ref 命令的结果 如 12i, 12ii 等,可使用下面的命令(最好放在导言区中)
          \renewcommand{\thesubfigure}{\roman{subfigure}}
    \makeatletter
    \renewcommand{\@thesubfigure}{(\thesubfigure)\space}
    \renewcommand{\p@subfigure}{\thefigure}
    \makeatother
  • 若想让子图标题标记使用阿拉伯数字如 12.1:, 12.2: 等, \ref 命令的结果 如 12.1, 12.2 等,可使用下面的命令

    \renewcommand{\thesubfigure}%
    {\thefigure.\arabic{subfigure}}
    \makeatletter
    \renewcommand{\@thesubfigure}{\thesubfigure:\space}
    \renewcommand{\p@subfigure}{}
    \makeatother
缺省情况下,用 \listoffigures 命令生成的图形目录中只包括图形, 而不包括子图。要想在图形目录中包括子图,要在 \listoffigures 命令前加上 \setcounter{lofdepth}{2}。 需要说明的是,由于 LATEX 的变化,导致目前版本(3/95) 的 subfigure 宏包在图形目录的子图输入项开始部分都加上 ``numberline1''。将下面的代码加到导言区中就可以解决这一问题。
\makeatletter
\renewcommand{\@subcaption}[2]{%
\begingroup
\let\label\@gobble
\def\protect{\string\string\string}%
\xdef\@subfigcaptionlist{%
\@subfigcaptionlist,%
{\numberline {\@currentlabel}%
\noexpand{\ignorespaces #2}}}%
\endgroup
\@nameuse{@make#1caption}{\@nameuse{@the#1}}{#2}}
\makeatother

Latex 图片

插入eps图片
使用\includegraphics[选项]{文件} 命令可以插入eps图片。下面是一个最简单的例子:

\documentclass{article}
\usepackage{graphicx} %使用graphicx包
\begin{document}
\includegraphics{file.eps} %插入图片,按图片原尺寸插入
\end{document}

注意:
(1)eps文件和tex文件放在同一个文件夹,只用文件名就可以调用,不用写路径。

(2)编译时不能使用pdflatex,会出错。即使不出错,也看不到图。应使用latex编译生成dvi,然后dvi2ps,ps2pdf就可以看到图了。

使用[选项]可以指定图片大小:

\includegraphics[width=3in]{file.eps}
设定图片宽度为3 inches,图片高度会自动缩放。

\includegraphics[width=\testwidth]{file.eps}
设定图片宽度为文本宽度。

\includegraphics[width=0.8\textwidth]{file.eps}
设定图片宽度为文本宽度的0.8倍

\includegraphics[width=\testwidth-2.0in]{file.eps}
设定图片宽度比文本宽度少2 inches。

使用[选项]指定图片旋转角度:
\includegraphics[angle=270]{file.eps}
将图片旋转270度。

两个选项同时使用,中间用逗号隔开:
\includegraphics[width=\testwidth, angle=270]{file.eps}


1,插入jpg图片
在命令行环境下,使用命令:
ebb figure.jpg
生成bounding box文件figure.bb。

使用如下命令:
\includegraphics[width=0.8\textwidth]{figure.jpg}

可以使用Pdf Texify直接编译成pdf文件。

2,插入bmp图片
还没有找到直接插入bmp图片的方法。现在的方法是,使用
gimp将bmp转换成jpg,然后按上述方法插入。转换时不要
使用windows自带的painter,图片质量损失太多。用gimp或
fastone image viewer,将jpg质量选为最高,转换之后得到的
图片质量较好。

3,同时插入jpg和eps图片
插入的命令不变。编译时使用Latex, dvi2pdf,两种格式的
图片都可以显示。


1,插入并列的子图

\usepackage{subfigure}


\begin{figure}[H]
\centering
\subfigure[SubfigureCaption]{
\label{Fig.sub.1}
\includegraphics[width=0.4\textwidth]{figurename.eps}}
\subfigure[SubfigureCaption]{
\label{Fig.sub.2}
\includegraphics[width=0.4\textwidth]{figurename.eps}}
\caption{MainfigureCaption}
\label{Fig.lable}
\end{figure}


2,控制图片位置
如果不喜欢让Latex自动安排图片位置,可以使用float包,然后
用\begin{figure}[H]。

\usepackage{float}